
We know why you are here! So without any fancy introductory paragraph, let's delve right into it! Before we start, to clarify a common confusion, there is not a separate platform for Instagram ads; both Facebook and Instagram ad campaigns are set up through the Facebook Ad Manager. Once set up, you can pick and choose which platform you would like your ads to show or let Facebook optimize it for you.
Before setting up your first Facebook/Instagram campaign, make sure to add the Facebook pixel to your website. Keep in mind that Facebook Pixel is crucial to assess and optimize the performance of your Facebook ads. This post will assume you have successfully gone through this phase.
As mentioned in our previous post, Facebook has three levels of ad set-up, campaign, ad set, and ad. Take a look at this post for more details.
You can find your Facebook Ad manager on your Facebook business page: https://business.facebook.com/ Click on top right:
 You should land on Facebook Ads Manager. On this screen click on the “Create” button to start your first campaign.
 This pop-up will bring up different campaign types, read through the details, and select the one that fits your objective the most. If you’re running an online business, “Conversions” is the way to go. This will show your ads to people most likely to take action, like purchasing on your site.
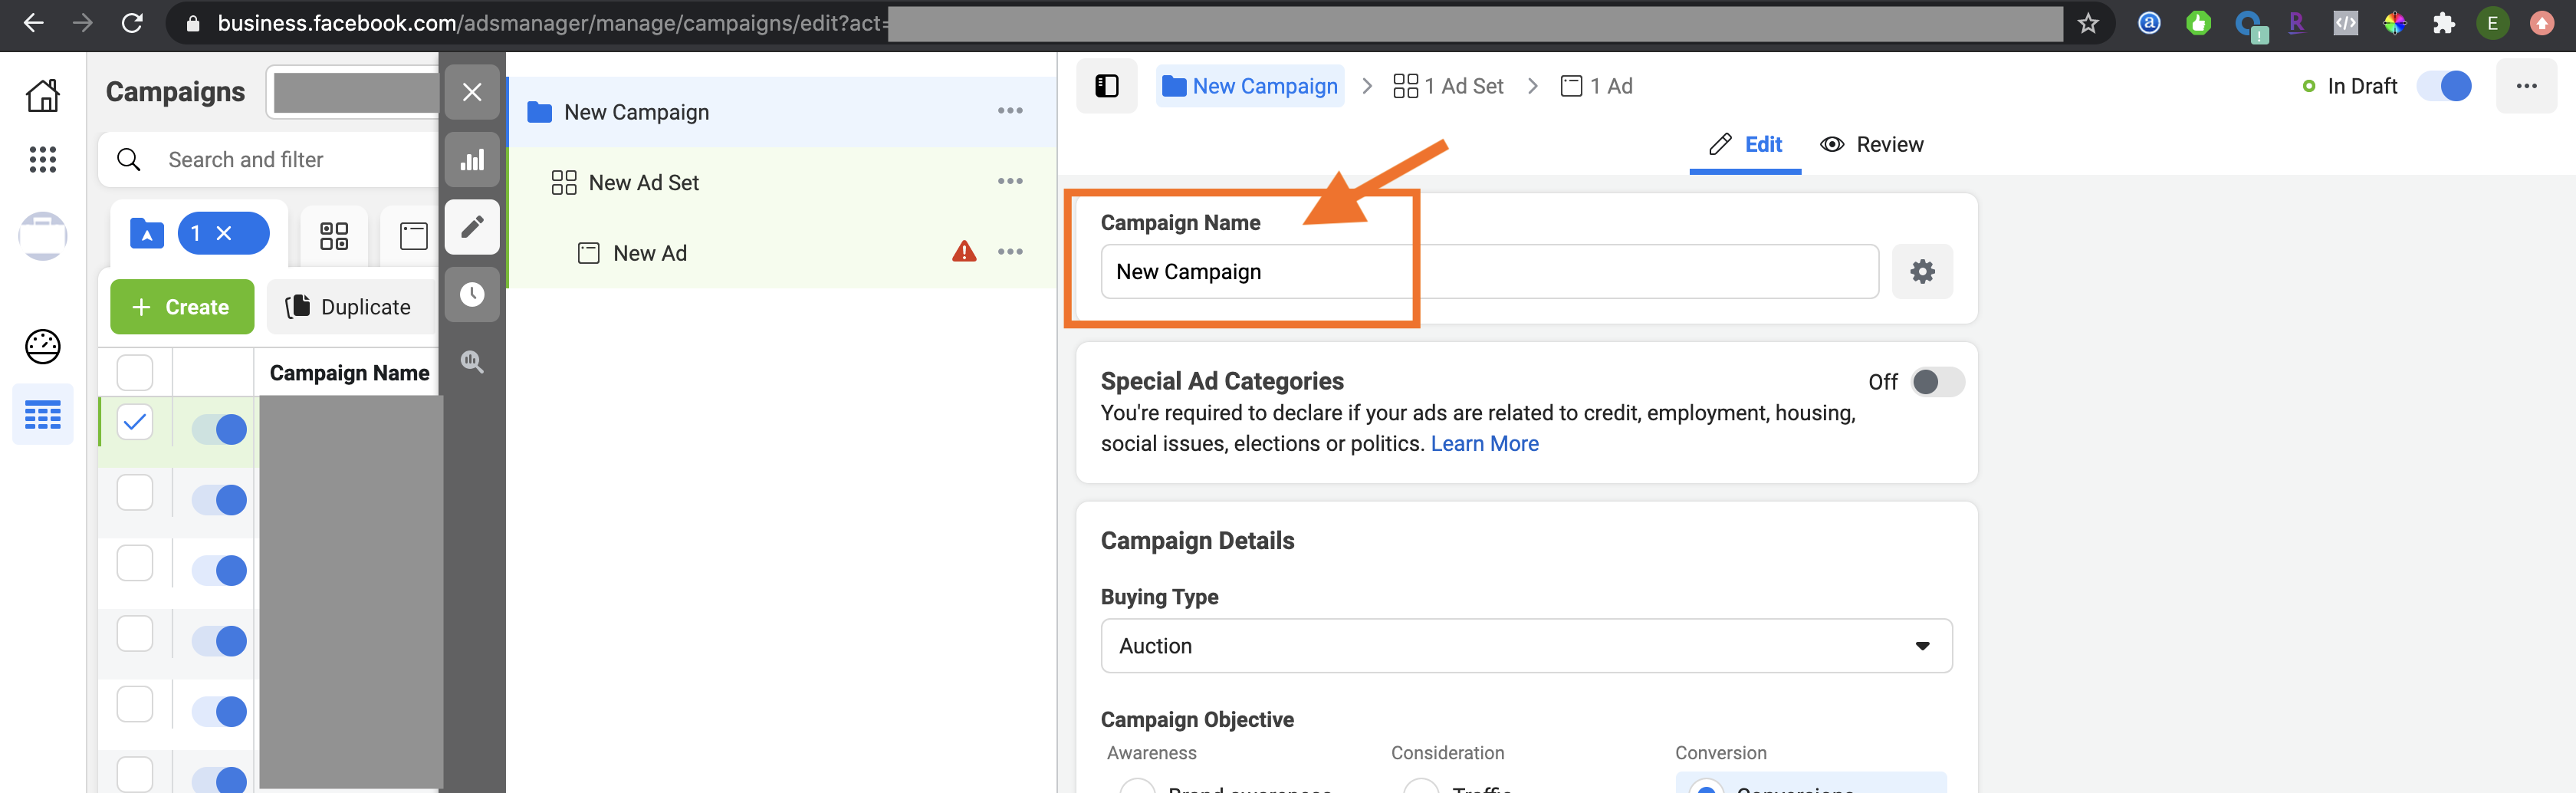
 Select “conversions” hit “continue”. Next up, you will enter the details about your campaign, give it a name here:
 We recommend to turn the “campaign budget optimization” off so you can configure this on an “ad set” level to set budget on an audience level. Once done, hit next.
 Next up, Ad Set level configuration. What separates one ad set from another is the target audience. The headline here is to set up a unique audience for each ad set.
Name your ad set. Select the pixel event you would like to optimize your ad set for. This event will come from your pixel. In the below example, we are selecting “Purchase” as the event to optimize this ad set against.
 Set a daily budget for this ad set. And select an audience specifically for this ad set. Remember, this is what separates each ad set, different audiences. If you believe you have multiple distinct target audiences, you should create a separate ad set for each. Once done, hit next.
 Now we are on the final step, Ad level configuration. At this level, we will create an ad for each creative we would like to run/test. Give your ad a name.
 Upload your creative, and include a primary text to it. This is what Facebook/Instagram users will see on top of your post. As you type, you will see modules on the right side that will show you a preview of your ad, and how these texts will show up around your creative.
The Headline and Description text fields are optional, but we highly recommend filling these in as well. Add Website URL. This is where people land when they click the ad.
 Repeat these steps for as many targets (ad sets) and creatives (ads) as you would like. Good luck!
If you are looking for ways to simplify your Facebook Ad Management, check out Boostify! With Boostify, you focus on strategy while we manage your campaigns!